


Introduction
Decontamination is the physical or chemical process that renders an inanimate object that may be contaminated with harmful microbial life safe for further handling. The objective of decontamination is to protect the preparation and package workers who come in contact with medical devices after the decontamination process from contracting diseases caused by microorganisms on those devices.
Steps in the Decontamination Process
Instruments with cutting edges such as scissors, rongeurs, chisels, curettes, etc., should be checked for sharpness. There should be no dull spots, chips, or dents.
Hinged instruments such as clamps and forceps should be checked for stiffness and alignment of jaws and teeth. Tips should be properly aligned, jaws should meet perfectly, and joints should move easily. Ratchets should close easily and hold firmly. Any instruments with pins or screws should be inspected to make sure they are intact. Plated instruments should be checked to make sure there are no chips, worn spots, or sharp edges. Worn spots can rust during autoclaving. Chipped plating can harbor soil and damage tissue and rubber gloves. If any problems are noticed during the inspection process, these instruments should be either cleaned again, or sent for repair depending on the problem observed.

ASSEMBLY 1 | ASSEMBLY 2 |
Instruments and other items that are prepared for sterilization must be packaged so that their sterility can be maintained to the point of use. The materials and techniques used for packaging must allow the sterilant to contact the device during the sterilization process as well as to protect the device from contamination during storage and handling before it is used. The time between sterilization and use may range from a few minutes to several weeks to many months. The packaging material selected must also permit the device to be removed aseptically.
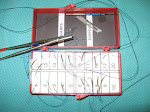
Types of Packaging


Work practices must be supervised. Written policies and procedures must be strictly followed by all personnel responsible and accountable for sterilizing and disinfecting items, and for handling sterile supplies. If sterility cannot be achieved or maintained, the system has failed. Policies and procedures pertain to;
Mechanical Indicators
Sterilizers have gauges, thermometers, timers, recorders, and/or other devices that monitor their functions. Most sterilizers have automatic controls and locking devices. Some have alarm systems that are activated if the sterilizer fails to operate correctly. Records are maintained and review for each cycle. Test packs (Bowie-Dick test) are run at least daily to monitor functions of each sterilizer, as appropriate. These can identify process errors in packing or loading.
Chemical Indicators
A chemical indicator on a package verifies exposure to a sterilization process. An indicator should be clearly visible on the outside of every on-site sterilized package. This helps differentiate sterilized from unsterilized items. More importantly, it helps monitor physical conditions within the sterilizer to alert personnel if the process has been inadequate. An indicator may be placed inside a package in a position most likely to be difficult for the sterilant to penetrate. A chemical indicator can detect sterilizer malfunction or human error in packaging or loading the sterilizer. If a chemical reaction on the indicator does not show expected results, the item should not be used. Several types of chemical indicators are available:
Positive assurance that sterilization conditions have been achieved can be obtained only through a biologic control test. The biologic indicator detects nonsterilizing conditions in the sterilizer. A biologic indicator is a preparation of living spores resistant to the sterilizing agent. These may be supplied in a self-contained system, in dry spore strips or discs in envelopes, or sealed vials or ampoules of spores to be sterilized and a control that is not sterilized. Some incorporate a chemical indicator also. The sterilized units and the control are incubated for 24 hours for Bacillus stearothermophilis at 131 to 141 F (55 to 66 C) to test steam under pressure, for 48 hours for Bacillus Subtilis at 95 to 98.6 F (35 to 37 C) to test ethylene oxide.
A biologic indicator must conform with USP testing standards. A control test must be performed at least weekly in each sterilizer. Many hospitals monitor on a daily basis; others test each cycle. Very load of implantable devices must be monitored and the implant should not be used until negative test results are known. Biological indicators also are used as a challenge test before introducing new products or packaging materials, after major repairs on the sterilizer, or after a sterilization failure. All test results are filled as a permanent record for each sterilizer.
No comments:
Post a Comment